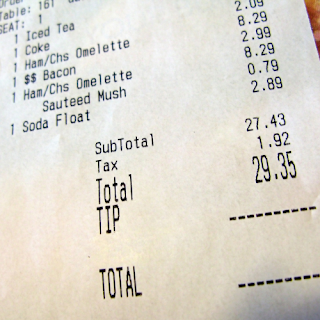
How to itemise transactions on the one receipt in Xero There are going to be times when you have the one receipt, but needs to be itemised into different Account Codes. This is a very simple process and if you follow our steps below, you can't go wrong. Step 1: On your dashboard in Xero on desktop, Click on the down arrow next to your business name on the left and click on Files Step 2: Tick the receipt which you want to itemise the transactions and then Add to new Bill Step 3: Fill in all the details that you have hopefully already learnt in How to attach your receipt to a transaction in Xero Step 4: Then add a new line for each transaction that needs to be Account Coded differently. You may have 3 items for 1 Account Code Materials on one line and 2 items for Account Code Stock on another line and 1 item for Account Code Motor Vehicle Expenses on th...
Posts
- Get link
- X
- Other Apps
How to save receipts for business in Xero As a business owner, keeping track of receipts is an important part of maintaining the financial health of your business. With Xero mobile, you can quickly and easily attach receipts to transactions, ensuring that you have all the necessary documentation in one place. In this blog post, we’ll show you how to attach receipts on Xero mobile. Step 1: Open the Xero mobile app To attach receipts on Xero mobile, you’ll need to have the app installed on your mobile device. If you haven’t already done so, you can download the app from the App Store or Google Play. Once you’ve downloaded and installed the app, open it on your device. Step 2: Press the + symbol on the top right of the App. From the dropdown menu, choose Upload to file Inbox and then choose, take photo Step 3: The Xero App will open up your camera. Lay your hardcopy receipt on a flat surface and take a photo of it. If ha...
- Get link
- X
- Other Apps
How to set up your Google Business Profile I think you are here, because you thought it might have been relatively easy to set up your free Google Business Profile. However, you do need this along with your socials. More platforms, more eyes on your content is the best way of looking at it. Also, you can ask your customers for Google Reviews . Below are steps to help you get started. On your desktop computer, sign in to your Google Account, or create one. NOTE: If you are creating a new Google Account, sign up with your business email not your personal email. Create the Google Business Profile by firstly entering the name of your business. If you get a message that someone else has already verified the business, request ownership of the Business Profile . Search for your business category. (If you are unsure, check with other businesses similar to yours) and then click Next . You will need to choose if your business has a location ...
- Get link
- X
- Other Apps
How to get Google Reviews Do you find it hard to ask your customer for a review? Are you to scared to ask just incase they say no or even worse, give you a bad review? There is a very easy way to ask your customer for a review. First make sure you have a Google Business Profile In your Google Account, click on the 9 dots (Google Apps) open your Google Business Profile. and scroll down and on the right hand side, you will see details about your Google Business Profile. On the right of Reviews is Get More Reviews. If you click on Get More Reviews there is a review link that you can copy. Once you have this link, it is really up to you how you use it with your customer. My best practice advice would be to send your very happy customer a follow up text message to confirm they were happy with your services / products Here are a couple of examples that I am more than happy for you to use: "Hi Lisa, it was an honour to be of assistance setting u...
- Get link
- X
- Other Apps
How to attach your receipt to a transaction in Xero If you have not read our Blog How to save receipts for business in Xero read this before learning how to attach your receipt to a transaction in Xero. This is truly the best way of storing your receipts. Below are our favourite highlights of why saving your receipts to your transactions makes sense. The receipt will always be with the transaction. No more hunting for it. You won't need to keep a hardcopy if you don't want to as it is saved in Xero The receipt will never fade like a hardcopy version does It can be used as Proof of Purchase if the transaction is under warranty There are two ways you can attach your receipts to the transaction and we will go through both ways. Follow our steps below on how to attach your receipts to a transaction in Xero. Attach a receipt to a transaction by creating a Bill Step 1: Open Xero on desktop On your Dashboard in Xero, click on the down ...